Treating Kitchen-Table Knife Cuts: Compact First Aid for Pumpkin Carving Lacerations
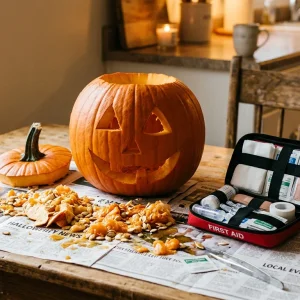
Newspaper sheets cover the kitchen table. Pumpkin pulp clings to everyone’s fingers. Your child wants a classic triangle nose, so you force a dull kitchen knife through two inches of tough rind. The blade jams. You apply extra force. The steel violently breaks through, skids across slippery skin, and buries itself into the web space of your non-dominant hand.
Blood pools instantly over orange slush. In seconds, a festive family project turns into a medical emergency. You must act fast: seal out soil-borne bacteria, arrest active bleeding, and control the room before panic takes over.
Immediate Action: Controlling the Bleeding
Drop the blade. Resist the urge to rush to the sink and flush the open cut under cold running water. Forcing tap water under pressure into an actively hemorrhaging wound washes away early clotting factors while pushing surface bacteria deeper into subcutaneous tissue.
Apply direct, continuous pressure. Grab dense, non-adherent sterile gauze sponges from your compact first aid kit. Center the pad directly over the laceration. Drive firm pressure into the site with your opposite thumb and raise your hand above heart level.
Maintain constant pressure for five full minutes without lifting the sponge to check the cut. Peeking tears open fragile fibrin networks forming over severed micro-vessels. If blood saturates the initial pad, stack a second sterile sponge right on top. Never strip away the bottom layer.
Evaluation and Cleaning: Treating Knife Cuts on the Hand
Once bleeding slows to a minor ooze, assess wound depth. Hand anatomy packs critical structures into tight quarters. Superficial cuts remain inside the skin layers. Deeper blade penetrations endanger flexor tendons, digital nerves, and palmar arterial arches.
Seek immediate emergency department or urgent care evaluation if you observe any of these warning signs:
- Numbness, tingling, or loss of sensation in the tip of any finger.
- Inability to flex or extend finger joints against light resistance.
- Pulsatile, bright red blood that defies continuous ten-minute direct pressure.
- Yellowish fat globules or dense white tendon structures visible inside the wound track.
If the laceration is superficial, begin wound care with sterile irrigation. Flush the cut using sterile 0.9% saline solution or clean drinking water squeezed firmly from a bottle. Pumpkin pulp carries soil-borne pathogens like Clostridium species and wild fungi. Irrigate out every speck of debris. Skip harsh chemical antiseptics like rubbing alcohol or hydrogen peroxide—they destroy healthy tissue cells and delay healing.
Closing and Bandaging the Laceration
Securing dressings on high-mobility skin requires the right technique. Hands flex, sweat, and stretch. Standard plastic adhesive bandages peel off the thumb web within minutes of basic movement.
Pat the skin around the cut bone-dry with sterile gauze while leaving the wound bed clean. Pull the edges together gently using wound closure strips (butterfly bandages). Apply them perpendicular to the laceration line like miniature sutures, leaving small gaps between strips to allow natural fluid drainage.
Wrap the hand with a non-latex self-adherent cohesive wrap. This elastic wrap bonds only to itself, not to skin or raw wound tissue. It maintains consistent light compression over the dressing without compromising blood supply to the fingers.
Product Focus: Compact First Aid Kit & Trauma Accessories
A standard medicine cabinet kit usually contains thin plastic strip bandages and expired burn cream. It fails during active bleeding incidents. For home workshop and seasonal project preparedness, a rapid-access compact first aid kit loaded with medical-grade components is essential.
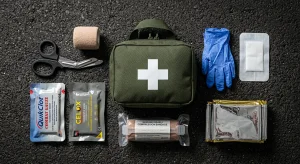
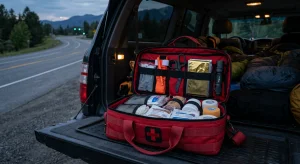
Primary Unit Specs: A heavy-duty home and field IFAK pouch built from 500D Cordura nylon with tear-away hook-and-loop backing. Designed for mounting under kitchen cabinets, inside vehicle glove boxes, or on garage pegboards. Compact dimensions (7" x 5" x 2.5") deliver portability without wasting storage space.
Essential Add-on Accessories & Compatibility:
This compact kit serves as a modular platform. To maximize utility for puncture and sharp-blade trauma, extend the kit using exterior mounting loops or internal elastic organizers:
- Hemostatic Gauze Dressing (Add-on Component): Standard cotton gauze relies entirely on your body's natural coagulation. Hemostatic gauze impregnated with kaolin or chitosan accelerates clotting within seconds, halting heavy venous bleeds from deep knife slips. Stows flat inside the interior sleeve.
- Trauma Shears (Exterior Accessory): Mounted to exterior webbing with a secure snap-strap. Shears cut away blood-soaked gloves, sleeves, or heavy clothing instantly without exposing the patient to sharp point risks.
- Self-Adherent Cohesive Bandage Rolls: Replaces standard adhesive tape. Conforms easily to finger joints and palms, maintaining grip even when skin is slick with pumpkin oil or moisture. Fits inside primary elastic loops.
Practical Guidelines for Pumpkin Carving Safety
Treating hand cuts is a reactive measure. Preventing blade slippage in the first place keeps the holiday intact.
- Use Purpose-Built Serrated Tools: Put away chef knives, paring knives, and utility blades. Specialized pumpkin carving saws feature short, narrow serrated blades that cut through tough rinds without requiring heavy forward force.
- Mind Your Free Hand Location: Never position your stabilizing hand directly in line with the blade's path. Keep your non-carving hand on the top or side of the pumpkin, clear of any slip vector.
- Dry the Work Surface: Keep shop towels or paper towels within arm's reach. Wipe pumpkin slime off tool handles and skin continuously. Slips happen when hands lose friction on slick surfaces.
- Carve Under Bright Lighting: Dim lighting casts shadows over carved outlines, leading to awkward angles and poor blade control.
Frequently Asked Questions
Should I use household super glue to close a pumpkin carving hand cut?
No. Industrial super glue contains ethyl cyanoacrylate, which releases heat and toxic byproducts as it cures, causing chemical irritation inside open tissue. Use medical-grade skin adhesive (butyl cyanoacrylate) or sterile wound closure strips from your compact first aid kit. If a cut is deep enough that you feel compelled to glue it, seek professional evaluation for sutures.
How long should I leave butterfly closures on a hand cut?
Leave butterfly closure strips in place for 5 to 7 days until they peel off naturally. Keep the area clean and dry for the first 24 to 48 hours. If the edges pull apart, red streaks spread, or yellow pus appears, remove the dressing and seek medical attention.
When does a pumpkin carving hand cut require a tetanus booster?
Pumpkins grow in raw soil that harbors Clostridium tetani spores. If your cut is deep or contaminated with soil, and your last tetanus booster was more than 5 years ago, get a booster within 48 hours of the injury. For clean, minor cuts, a 10-year window is standard.